Experiences
Create, edit, and configure experiences, including guidance for each tab on the edit page.
Experiences
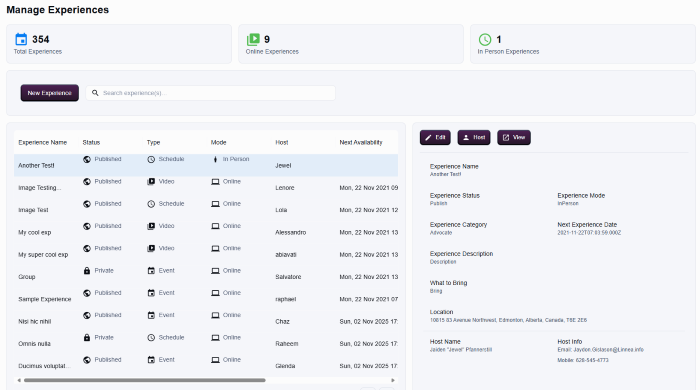
The Experiences area is the hub for building and maintaining Curiko experiences.
Dashboard Overview
- Counters summarise Total Experiences, Online Experiences, and In-Person Experiences.
- Use Search experience(s)… to locate specific titles quickly.
- The table lists each experience with columns for Experience Name, Status, Type, Mode, Host, and Next Availability.
Creating a New Experience
- Click
 to open the creation modal.

- Provide the required fields:
- Experience Title
- Type (Video, Schedule, Event, and so on)
- Mode (Online or In Person)
- Host (search by ID, email, or name)
- Add descriptions, tags, availability, pricing, and accessibility details as needed.
- Select Submit when the information is accurate. Use Cancel to exit without saving.
- Remember that submitting publishes or drafts the record, so confirm every detail first.
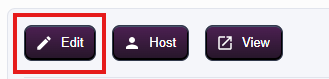
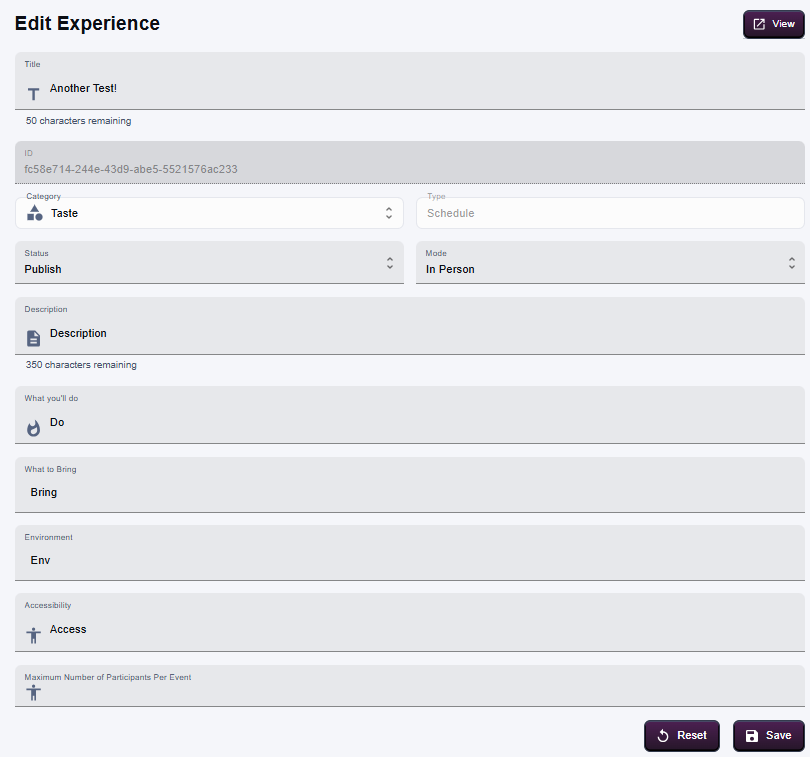
Editing an Experience
- Select an experience row to open the edit page, then click on
- Update the core fields such as title, description, category, type, mode, date availability, and status.
- Use Save to commit the changes. Publishing or unpublishing happens from this page as well.
- Coordinate with hosts before adjusting schedule or status, since updates can trigger communications.
Deleting an Experience
- There's no option to delete an experience directly. Instead, you can unpublish it so that it will no longer be available for booking on the platform.
Tabs on the Experience Edit Page
The right-hand panel includes tabs that expose additional configuration controls. Switching tabs does not save automatically, so you can review information safely.
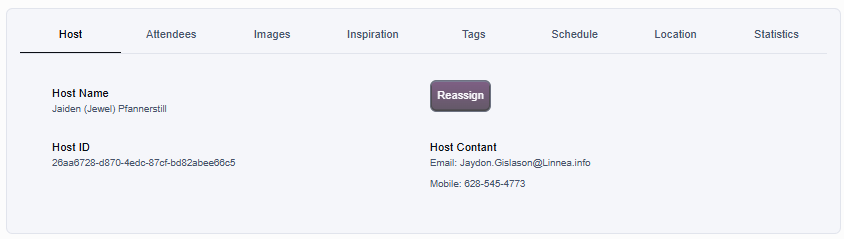
Host
- Displays Host Name, Host ID, and Host Contact details.
- Use Reassign to select a different host. The change applies only after confirmation.
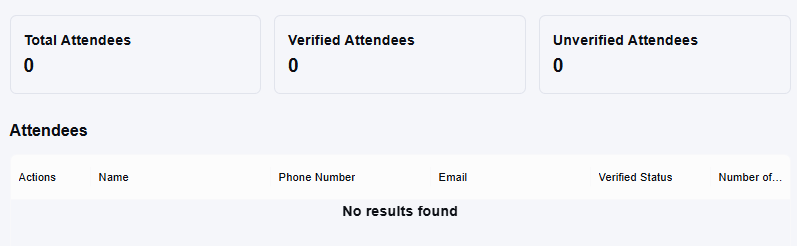
Attendees
- Shows Total, Verified, and Unverified attendee counts.
- The table lists attendees with columns for Actions, Name, Phone Number, and Email.
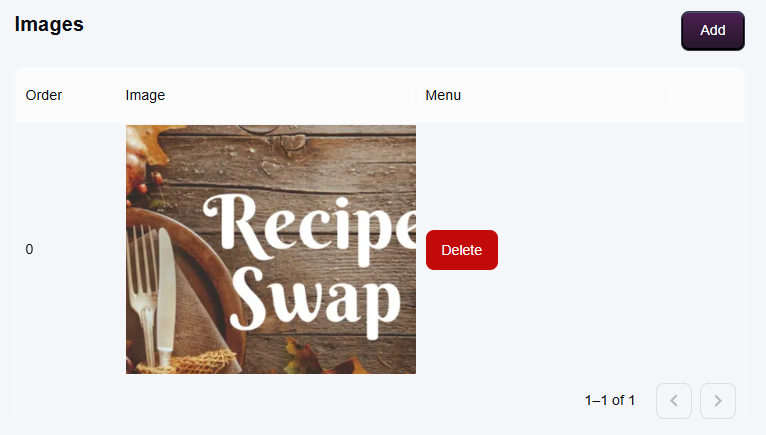
Images
- Manage gallery images for the experience.
- Use Add to upload or select photos.
- The table tracks Order, the Image preview, and a Menu for deleting or reordering items.
Inspiration
- Holds descriptors that refine recommendations: Hobby, First, Second, Third, Interest, Second Interest, and Part of Day.
- Populate fields with concise phrases (for example, “painting”, “morning”) or leave blank if not needed.
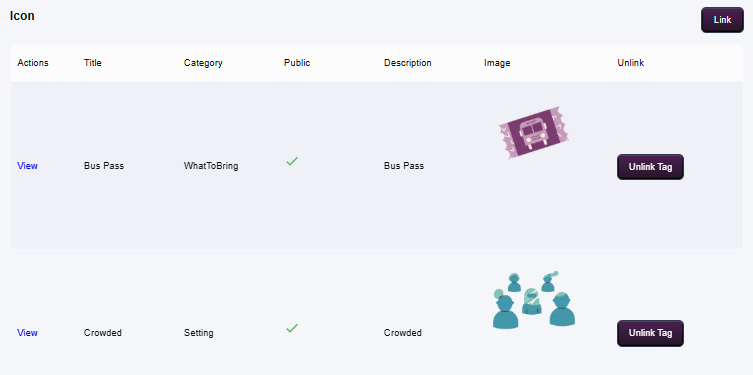
Tags
- Attach tags such as accessibility notes or setting descriptors.
- Configure optional Icon and Link fields.
- The table shows applied tags with columns for Actions, Title, Category, and Public visibility.
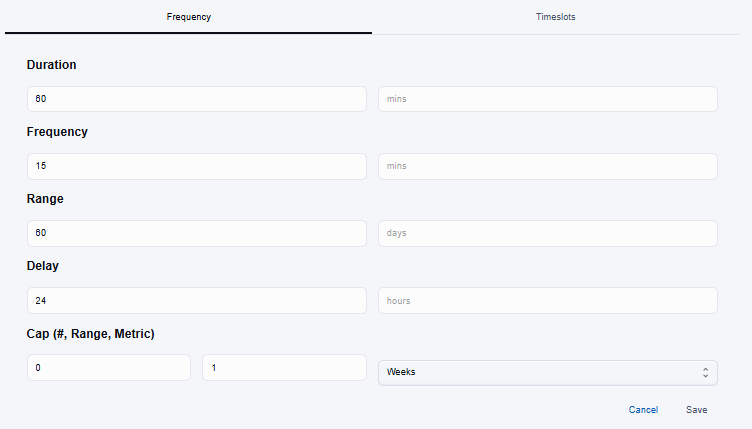
Schedule
- Controls when the one on one experience runs and includes two sub-tabs:
- Frequency: define recurring rules, including duration, cadence, date range, delay, cap, and metric. Save to store the schedule or Cancel to discard changes.
- Timeslots: add single sessions manually. Each slot records start and end timestamps. Use the row menu to edit or remove entries.
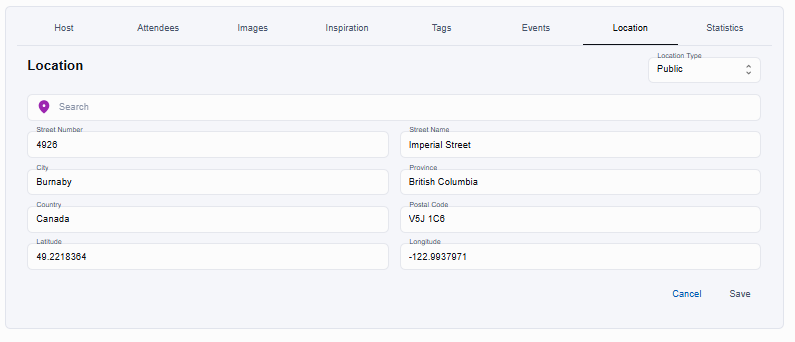
Location
- Capture venue information for in-person experiences.
- Choose a location type (Home or Public) and complete the address fields (Street Number, Street Name, City, Province, Country, Postal Code, Latitude, Longitude).
- Save when the address is correct; Cancel leaves the previous details intact.
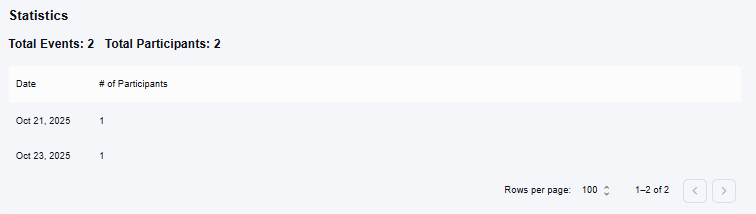
Statistics
- Provides a read-only snapshot of Total Events and Total Participants tied to the experience.
- Additional rows list individual dates with participant counts when data exists.